Creating Your Own Collectible on Playbite
Last updated
Ever wondered how Collectibles are created on Playbite? Have you wanted to make your own? We created this guide to teach you or your team how to make your own using a free modeling tool called Blender!
In this step-by-step guide, we will walk you through the process of creating your very own collectible using the software, Blender. Whether you’re a beginner or have some experience with digital art, we’ve got you covered. By following these instructions, you’ll be able to design and bring to life unique characters that can be uploaded to Playbite, an app where you can not only sell your collectibles but also play as them in supporting games. So, let’s dive in!
Step 1: Download Blender
- Open your web browser and go to the official Blender website at www.blender.org.
- Once you’re on the Blender homepage, click on the “Download” tab located in the top menu.
- You will be directed to the download page where you’ll find different versions of Blender available. Choose the version that is compatible with your operating system (Windows, macOS, or Linux).
- Click on the appropriate download button to start the download process.
- Depending on your internet speed, the download may take a few moments to complete. Be patient!
- Once the download is finished, locate the downloaded file on your computer. It will typically be in your Downloads folder unless you’ve chosen a different location.
- Double-click on the downloaded file to start the installation process.
- Follow the on-screen instructions provided by the Blender installer. You can typically accept the default settings unless you have specific preferences.
- After the installation is complete, you can launch Blender by finding it in your applications or by double-clicking the Blender icon on your desktop if one was created during the installation process.
Congratulations! You’ve successfully downloaded Blender onto your computer. Now let’s move on to the next step and start creating your collectible!
Step 2: Download the Collectible Template
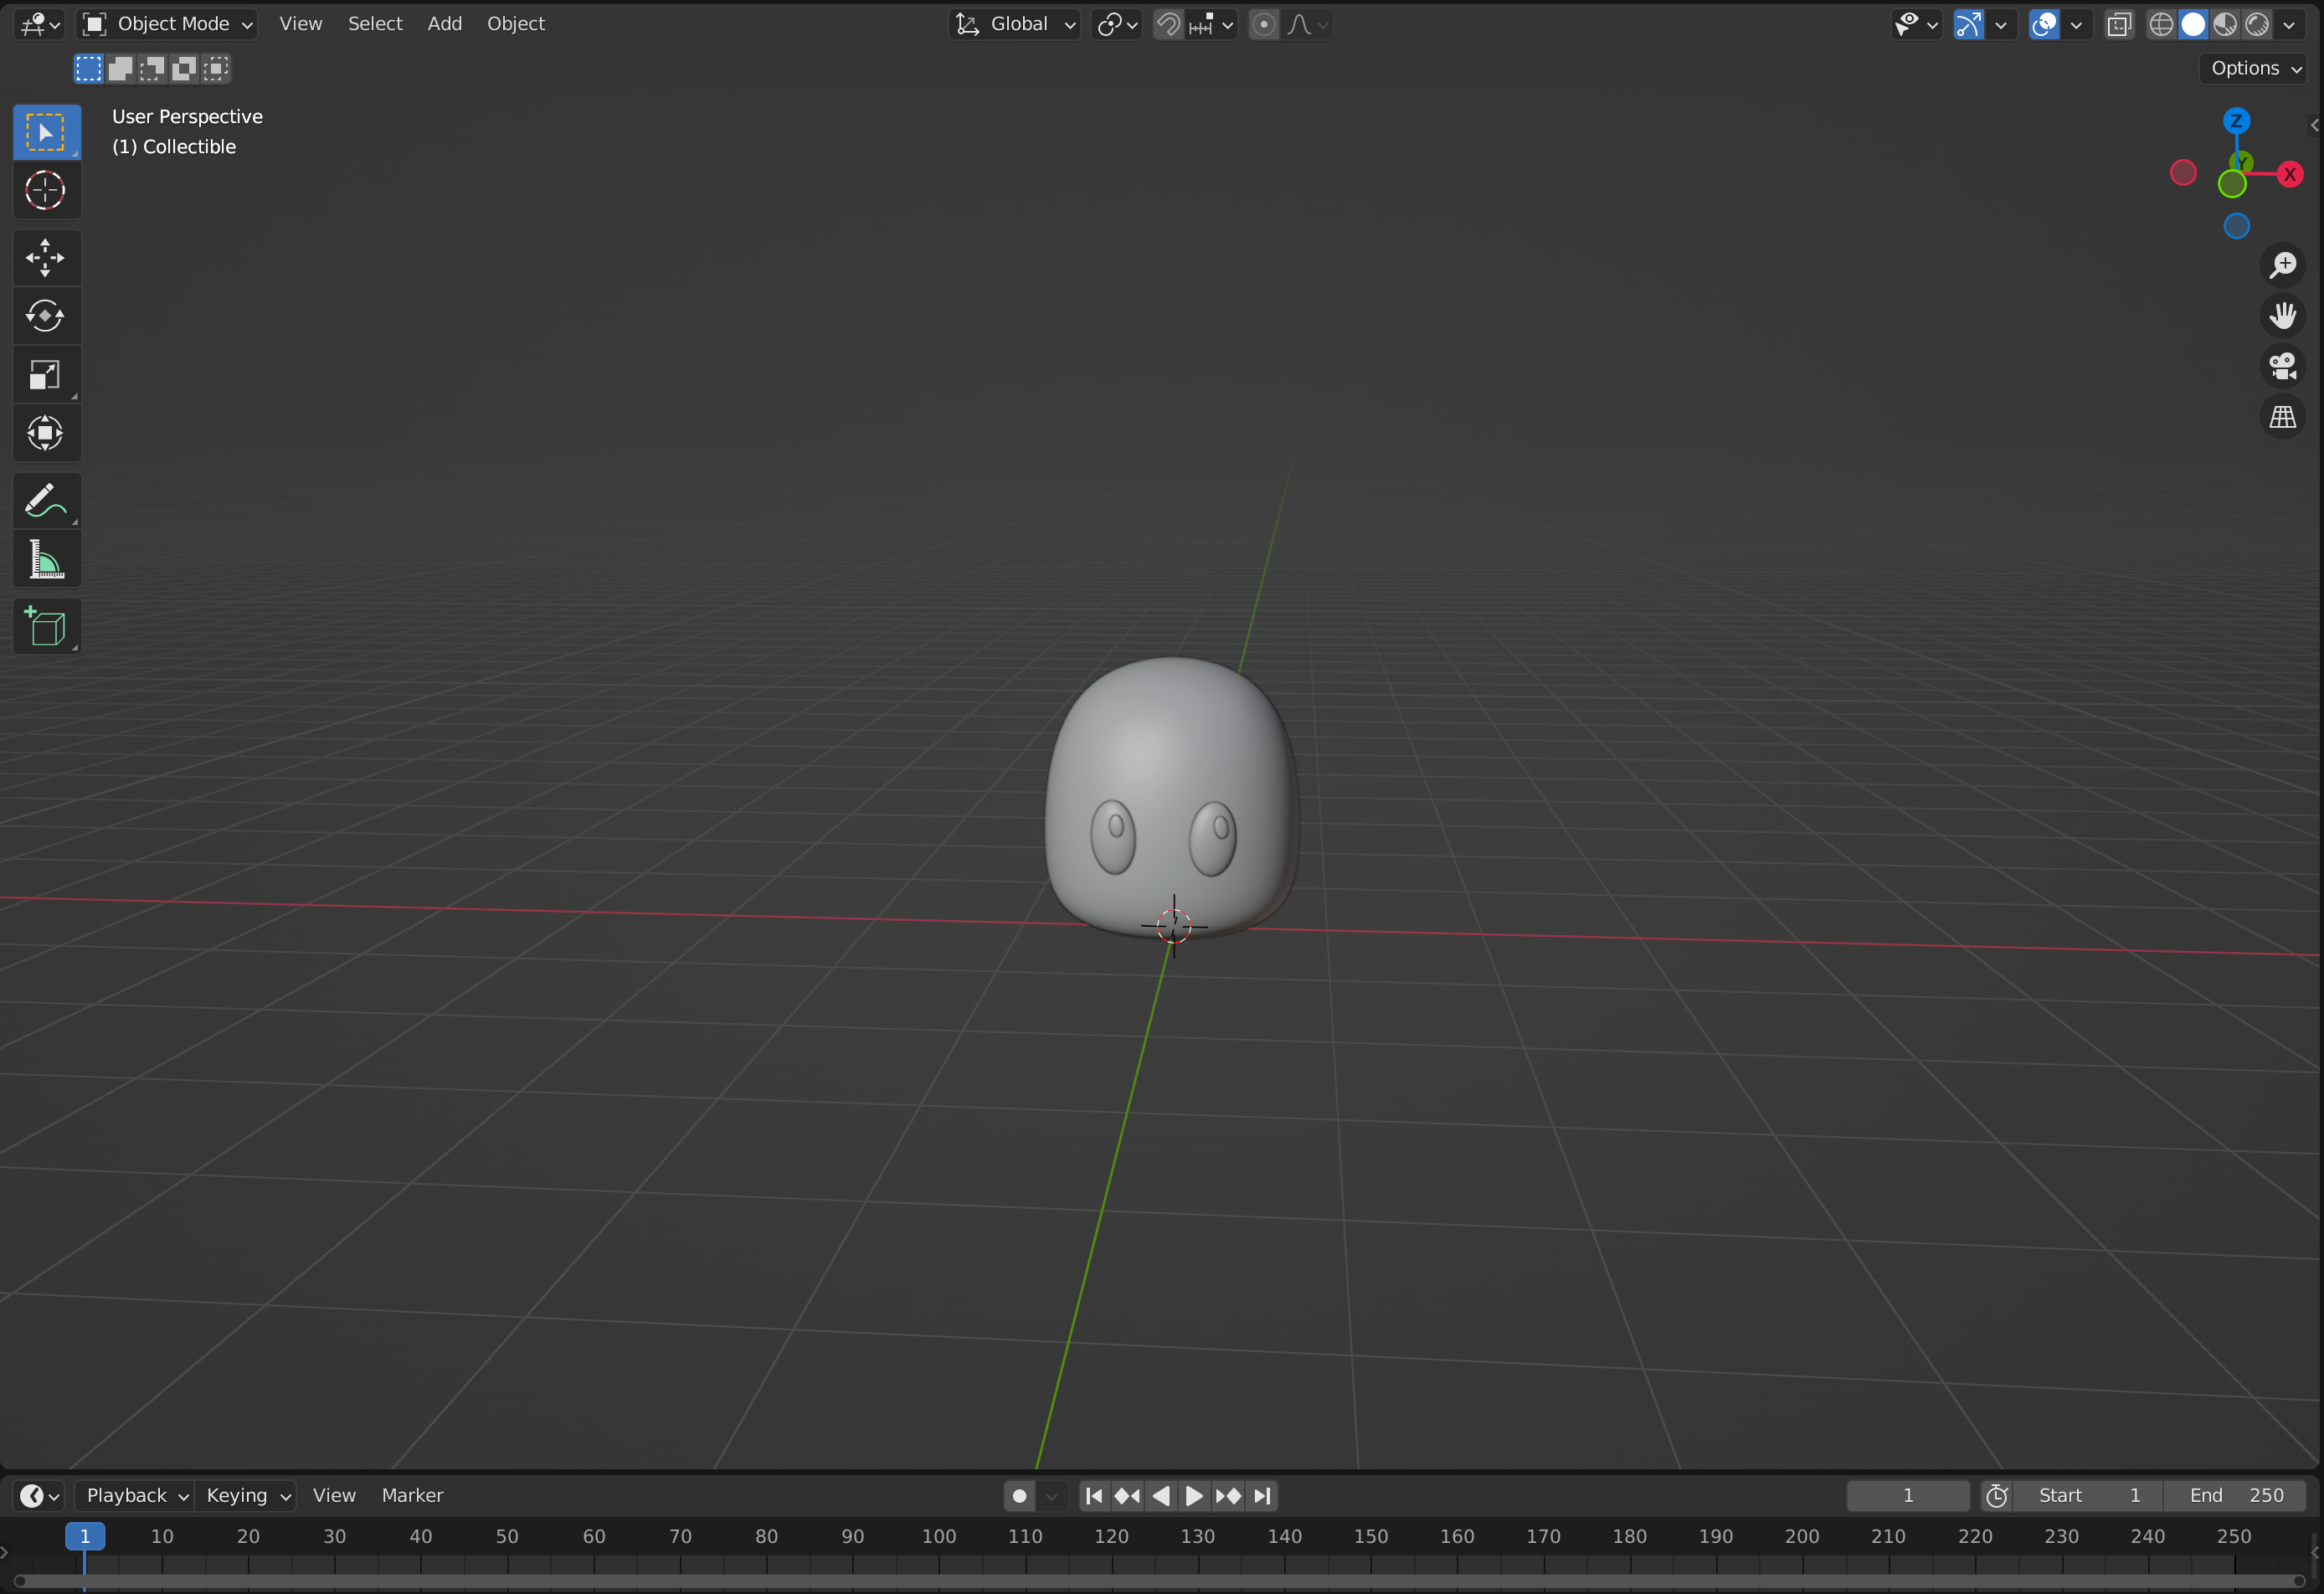
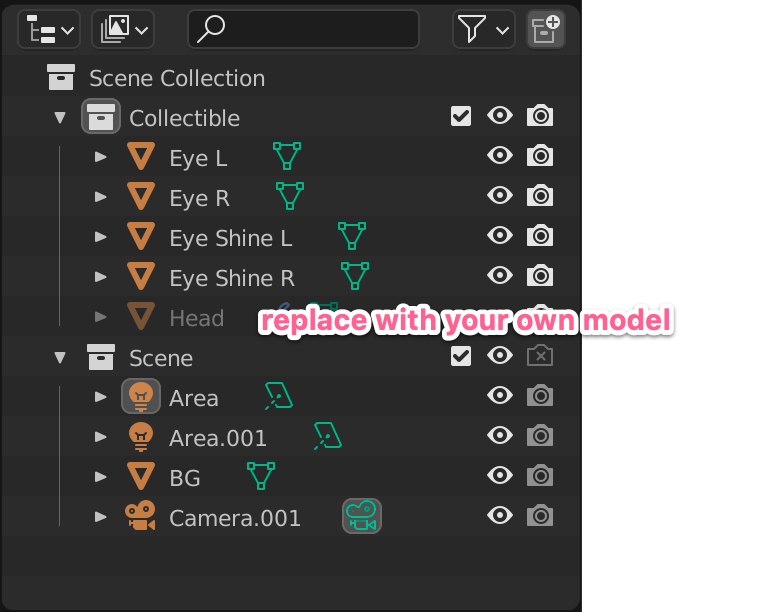
Now that you have Blender installed, you need to download the Template we use to create collectibles. Download our template here. Open this file in Blender and you should see our basic collectible, just like the screenshot below. Inside the file are two folders: “Collectible” and “Scene”. You need to keep everything in the “Collectible” folder except the “Head” object. The “Scene” is hidden by default, and we recommend keeping that off while you’re designing your collectible and then turning it on when you want to render your screenshot.
Step 3: Create your design
It is time to be creative! The design is set up so you keep the “Eye L”, “Eye R”, “Eye Shine L”, “Eye Shine R”. Edit or remove the “Head”. We recommend starting with the “Head” shape and either adding to it or manipulating it to understand how the Collectible template works. If you are looking for resources on how to use Blender, check out this great series on youtube from Blender Guru!
In order to conform to our Collectible design rules for submission, you need to keep the Eyes, and the Scene.
Step 4: Render your Collectible
Render your collectible model and make sure the Scene is unchanged with the exception of a background color you choose. Save your image. Congrats! You rendered your first collectible and are ready to submit to the Playbite team (if you feel it is ready).

Step 5: Submit Your Collectible to Discord
- Join the Playbite Discord (https://discord.gg/Grn4A8E20) and upload an image of your collectible to the #user-collectibles channel.
- Once your collectible receives 30 votes from the community, symbolized by the check mark emoji, you will be able to proceed and submit your collectible to the Playbite Team.
- Note: Please do not spam, beg, or harass other users for votes.
Step 6: Make your collectible Playbite compatible
- Start by obtaining the Baked Lighting Template, which will serve as a helpful guide. You can find the template here: Playbite-Baked-Lighting-Template.blend
- Open both your model file and the Baked Lighting Template in Blender. To transfer your model from your original Blender file to the Baked Lighting Template, you can utilize the copy and paste method. Select your model in the original file by clicking on it, then press ‘Ctrl + C’ to copy it. Switch to the Baked Lighting Template, and press ‘Ctrl + V’ to paste it. This will bring your model into the template.
- Ensure that the size and position of your model align with the yellow blob in the Baked Lighting Template. If needed, make necessary adjustments to match them perfectly. Once aligned, you can hide the yellow blob by selecting it and pressing the ‘H’ key.
Step 7: Ensuring the Correct Triangle Count
To optimize your collectible for smooth performance and compatibility within the game, it’s crucial to ensure the triangle count is within the appropriate range. Follow these steps to check and adjust the triangle count:
- The ideal triangle count for your collectible should be under 10,000. However, if necessary, a range between 10,000 to 20,000 triangles is acceptable.
- First, you need to make sure all modifiers are applied. To do this click on your object and go to the Modifier Properties tab. Apply all modifiers assigned to your object using the drop down. Do this for all objects that make up your collectible.

3. To check the triangle count of your model, click on the “Statistics” option in the drop-down menu. You can find this menu at the top of the Blender window.
4. Once you’ve selected “Statistics,” the triangle count will appear on the top left corner of the screen, providing you with an accurate measurement of the current triangle count of your model.

5. If the triangle count exceeds the recommended range, you can take steps to lower it. Start by selecting the object you wish to optimize and enter the Edit mode. You can do this by selecting the object and pressing the ‘Tab’ key.
6. Within Edit mode, go to the “Edges” drop down menu and choose the “Unsubdivide” option. This function helps reduce the number of triangles in your model, optimizing its performance. Note that in some cases, additional manual tweaking and deleting of specific elements may be required to achieve the desired triangle count.

7. It’s important to note that the official image of your collectible does not have to be identical to the in-game version, only the in-game collectible must adhere to the 10,000 to 20,000 triangle count range for it to function properly within the game.
Step 8: Scaling and Setting the Origin
To prepare your collectible for the final stages of the creation process, it’s essential to scale it correctly and set the origin point. Follow these steps to ensure the proper scaling and origin placement:
- Select your entire collectible by pressing ‘A’ or by using the selection tools to choose all the objects that make up your creation.
- With your collectible selected, press ‘Command + A’ (or ‘Ctrl + A’ for Windows) to access the Apply menu. From there, choose “Scale.” This step applies the current scale transformations to your collectible, ensuring it maintains the correct proportions.
- Next, while your collectible is still selected, navigate to the “Object” menu and choose “Set Origin.” From the sub-menu, select “Set to 3D Cursor.” This action places the origin point of your collectible at the current location of the 3D Cursor in Blender.
By scaling your collectible and setting the origin point, you’re ensuring that it is properly sized and positioned for further development.


Step 9: Prepare Your Workspace to Bake the Lighting
- Open two new Blender windows to set up a multi-view workspace. This will provide you with three views simultaneously for a more efficient workflow. You’ll need one window for your model, one for the UV Editor, and one for the Shader Editor. Arrange the windows side by side or in a way that is comfortable for you.
- In the first Blender window, ensure that you have your model displayed. This window will serve as your primary workspace for making adjustments and observing changes.
- In the second Blender window, switch to the UV Editor view. This window will be used to work with UV maps, which are essential for the baking process. You can switch views by using the drop down in the top left corner.

4. Finally, in the third Blender window, switch to the Shader Editor view. This window will allow you to work with shaders and materials, enhancing the visual quality of your collectible.

Step 10: Prepare Your Model to Bake the Lighting
- Begin by joining all the objects of the same color together. To do this, select the objects you want to join and press ‘Command + J’ (or ‘Ctrl + J’ for Windows) to perform the join operation. This step helps simplify the scene and streamline the baking process.
- With the joined objects selected, enter Edit mode by pressing the ‘Tab’ key. Then, select all the vertices of the object.
- In Edit mode, go to the UV menu and select “Smart UV Project.” This action creates a UV map for your object, which is crucial for accurately projecting the lighting onto the model.

Step 11: Setting Up the UV Editor
To prepare the UV Editor for the upcoming steps, follow these instructions:
- In the UV Editor view, you should see a mesh displayed. This mesh represents the UV map of your model.

- To create a new UV map, click on the “New” button in the UV Editor interface. A dialog box will appear.
- In the dialog box, provide a name for your UV map. Then, set the height and width values to 800. Ensure that the “Alpha” option is unchecked. Once you’ve filled in the necessary details, click “OK” to create the new UV map.

4. Now, it’s important to select the entire UV mesh. To do this, click and drag your cursor over the mesh, making sure that all the vertices are encompassed within the selection.

Step 12: Setting Up the Shader Editor
To begin working with nodes in the Shader Editor, follow these steps:
- In the Shader Editor window, locate the node editor interface. We will be adding an Image Editor node to this setup.
- To add the Image Editor node, press “Shift + A” simultaneously. This combination brings up the Add menu.
- Type “Image editor” in the search bar. The Image Editor node should appear in the results.
- Select the Image Editor node from the search results and it will be added to your Shader Editor workspace.
- Once the Image Editor node is added, you need to specify the name of the UV map you created earlier. To do this, click on the dropdown menu within the Image Editor node.
- From the dropdown menu, choose the name of the UV mesh you created. This connects the Image Editor node to the UV map, enabling you to work with the texture information for baking.

Note: Before proceeding, it is crucial to ensure that you have the following elements selected to avoid any issues during the process:
- Confirm that your UV Mesh is selected in the UV Editor. Make sure all the vertices of the mesh are highlighted or outlined to indicate that it is fully selected.
- In the Shader Editor, double-check that the Image Editor Node is selected. You should see a white outline around the node, indicating that it is currently active and ready to use.
- Lastly, ensure that your object is in Edit mode, and all its components (vertices, edges, and faces) are completely selected. This comprehensive selection guarantees that the entire object will be included in the baking process.

Make sure all elements are highlighted
Step 13: Baking the Lighting
- Start by ensuring that you are in the Cycles render engine. To do this, navigate to the Render Properties panel. Look for the render engine dropdown and select “Cycles” from the available options.
- Scroll down the Render Properties panel until you find the “Bake” section.
- In the Bake section, set the “Bake type” to “Combined.” This setting ensures that all the necessary lighting information is captured in the bake.
- Ensure that all relevant options, such as “Direct” and “Indirect,” are selected to include all lighting components in the bake.
- With the settings configured, click the “Bake” button to initiate the baking process.

Bake your lighting in the Render Properties tab
Step 14: Applying the Baked Lighting to Your Model
To apply the baked lighting to your model, follow these steps in the Shader Editor:
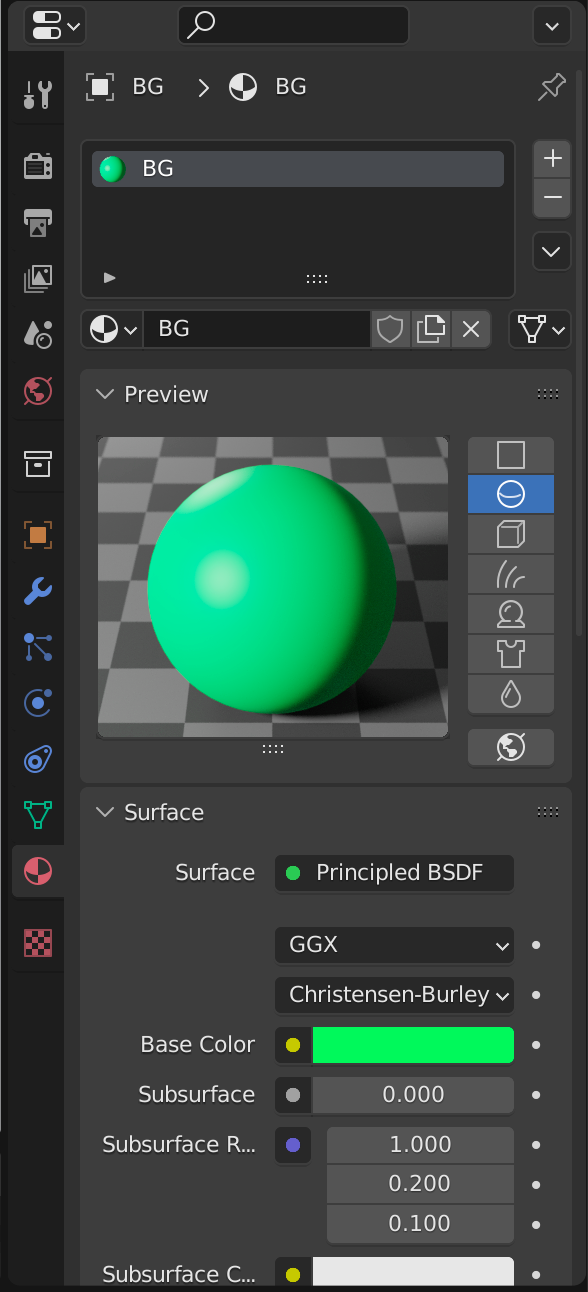
- In the Shader Editor, click on the “Object” dropdown menu and navigate to “World.” This allows you to work with the background settings.

2. Copy the “Background” node by selecting it and pressing “Ctrl + C” (or right-click and choose “Copy”).

- Go back to the “Object” dropdown menu and switch back to your main object’s shader setup.
- Paste the copied “Background” node among your existing nodes by pressing “Ctrl + V” (or right-click and choose “Paste”). This places the “Background” node alongside your other shader nodes.

- Connect the “color” output from the Image Editor node to the “color” input of the “Background” node. This links the baked lighting texture to the background color.
- Connect the “Background” output of the “Background” node to the “surface” input of the “Material Output” node. This final connection ensures that the baked lighting is applied to the surface of your model.

7. Repeat these steps for all the different colors or materials you want to apply the baked lighting to.
Step 15: Confirming the Baked Lighting
After applying the baked lighting to your model, it’s essential to verify that it appears as intended. Follow these steps to ensure the lighting looks correct:
- Hide all the lights in your scene. You can do this by clicking on the light models and clicking the (H) key. You can also hide the lighting by hiding the “scene” collection on the right panel. This step allows you to focus solely on the effect of the baked lighting and eliminates any interference from other light sources.

2. Switch to the Rendered Viewport mode. This mode provides a real-time rendering preview, allowing you to see how the lighting interacts with your model.
3. View these examples of baked lighting in the Rendered Viewport vs non baked lighting in the Rendered Viewport


Step 16: Exporting Your Model as GLB
To prepare your collectible for upload to Playbite, you need to export it as a GLB file format. Follow these steps to export your model correctly:
- First, select your entire object in Blender. Ensure that all components of your collectible are selected.
- Go to the “File” menu and select “Export,” then choose the option for exporting as GLB.
- In the export settings, make sure to include “Selected Objects.” This ensures that only the selected object is exported.
- In the “Animation” section, ensure that the animation export is turned off. You won’t need animations for Playbite at this point.
- Once you have configured the export settings, click “Export” to save your collectible as a GLB file.
- To verify the exported GLB file, you can test it using a GLTF viewer like the one available at **https://gltf-viewer.donmccurdy.com/**. This viewer allows you to inspect and preview your model in the GLB format.

Step 17: Submitting Your Collectible for Review
To share your collectible with the Playbite team for review and listing on their platform, follow these steps:
- Include the image file that represents your collectible.
- Include the GLB file you exported in the previous step.
- Include the Blender file you used to create the baked lighting.
- Choose a Name: Select a unique and catchy name for your collectible.
- Write a Description: Compose a compelling description of your collectible. Include details such as its concept, unique features, and any special attributes that make it stand out. Use descriptive language to engage potential buyers and create interest.
- Include your Playbite username.
- Determine the Playbit Price: Decide on the number of Playbits you want to sell your collectible for. Playbits are the in-app currency used on Playbite, and the price you set will determine the value of your collectible within the platform’s economy. Creators recieve 50% of the Playbit profit per sale.
- Contact Jessica (@PB-Jess) on Discord: Send a direct message (DM) to Jessica, a member of the Playbite team, on Discord. Join our Discord using this link: https://discord.gg/Grn4A8E2

- Include the Required Information: In your message to Jessica, attach the image file and the GLB file. Additionally, provide her with the chosen name for your collectible, the description you wrote, and the desired Playbit price. Make sure to present the information in a clear and organized manner.
- Wait for Review and Listing: After sending your message to Jessica, patiently await feedback from the Playbite team. They will review your submission, assess its quality and suitability for the platform, and provide you with further instructions or notifications regarding the listing process.
Best of luck with your submission, and congratulations on creating your unique collectible in Blender!